

You've carefully chosen a bathroom vanity, only to find it doesn't align with the pre-installed pipes after installation—a common issue in renovations that affects not just aesthetics but can also lead to leaks and functional problems.
"I made a huge mistake installing my bathroom vanity—the drainpipe was too far out, almost flush with the vanity's outer edge, and it looked terrible," a user urgently posted on a renovation forum. This scenario is all too common in bathroom renovations.
Common misalignments between vanities and pipes include: offset drainpipe positions, improperly placed angle valves, and incorrect cold/hot water pipe locations. These issues not only ruin the aesthetics but can also lead to leaks or even prevent the vanity from being installed properly.
I. Common Misalignment Problems and Their Causes
Misalignments between bathroom vanities and pipes manifest in various ways, but the most frequent issues fall into these categories:

Drainpipe Position Deviation is one of the most frustrating problems. Ideally, the drainpipe should be hidden inside the vanity cabinet. However, often due to inaccurate initial measurements, the drainpipe ends up too far outward, or even completely exposed outside the cabinet.
 Another common issue is Improper Angle Valve Placement. Angle valves positioned too low or incorrectly spaced horizontally can make installation difficult. This is especially problematic when a valve sits exactly where a drawer slide or vertical partition is planned, requiring cabinet modifications that complicate future maintenance and replacement.

Incorrect Wall-Mounted Drain Position is also frequent. Many homeowners prefer wall-mounted drains over floor drains for a cleaner look and easier cleaning. However, if the height or horizontal position of the wall drain is miscalculated, it will clash with the vanity's design.
 The root causes are diverse: inaccurate measurements during the planning phase, failure to consider the final vanity specifications during plumbing rough-in, or lack of installer expertise. More worryingly, some installers drill holes without confirming pipe locations, leading to nails puncturing pipes and causing slow leaks.
II. Solutions: Targeted Adjustments and Modifications
Different pipe misalignment problems require specific solutions.
Correcting Drainpipe Position Deviation
For a drainpipe already exposed outside the vanity, consider using a flexible hose as a transition. However, this method has limitations. If the deviation is significant, even a hose may not fully hide the pipe.
A more thorough solution involves localized pipe modification. This includes lifting floor tiles, clearing mortar, excavating about 70mm down, and rerouting the pipe. Crucially, this work can damage the existing waterproofing layer, which must be meticulously repaired to ensure a proper seal between old and new layers.
Strategies for Improper Angle Valve Placement
If an angle valve is too low (below 40cm) and a wall-mounted vanity is planned, one might cut the vanity's bottom rail or adjust the vanity's installation height. A better approach is to determine the correct valve height during planning—typically 45-50cm is ideal.
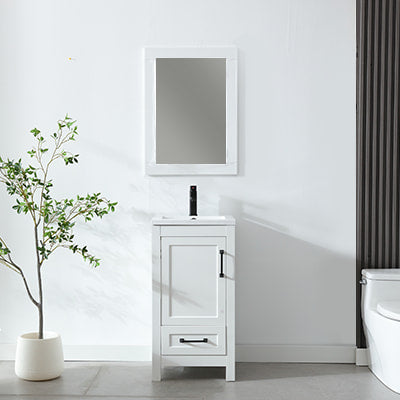
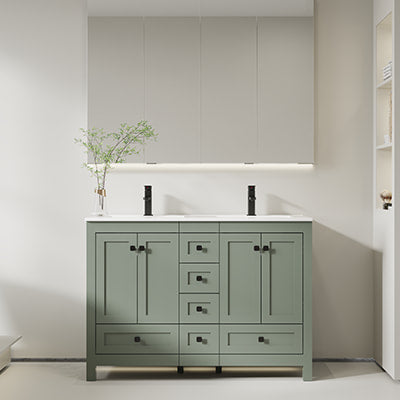
For incorrect horizontal placement, choosing a double-door vanity offers more flexibility than drawer-style models. For vanities wider than 80cm, consider three-door designs or combinations of drawers and doors.
Considerations for Wall-Mounted Drain Conversion
Wall-mounted drains offer clear advantages over floor drains: they are more aesthetically pleasing, increase usable space inside the vanity, and eliminate hard-to-clean corners. Converting to a wall drain requires about 1 meter of 40mm drainpipe and two 40mm 90° elbows.
The key is determining the correct height for the embedded pipe. The formula is: 850mm - Basin Height - 118mm (the minimum height for an adjustable drain stopper). Furthermore, a 90-degree wall drain generally offers better sealing than a 45-degree one and is the more reliable choice.
III. Installation Techniques and Key Considerations
Proper installation methods and attention to detail can prevent misalignment issues.
Installation Sequence is critical. The correct order is: first attach the drain assembly and faucet to the basin, then install the cabinet, and finally, clean and apply sealant. Each step should be checked before proceeding to the next.
 Applying Sealant is key to preventing leaks. The bead should be straight, consistent in width, without gaps or skips. Pay special attention to the joint between the vanity countertop and the wall, sealing it thoroughly to prevent moisture ingress.
 Leveling is essential for a properly installed vanity. Some installers skip this, resulting in a crooked installation. The correct method is: use a spirit level to mark the fixing points on the wall, confirm the cabinet is perfectly level, then drill and install.

Pre-Installation Pipe Inspection is equally important. Always know the layout of water pipes and electrical wiring to avoid damaging concealed utilities during drilling. There are cases where installers, unaware of pipe locations, drove screws directly into PPR cold-water pipes, causing slow leaks that required breaking tiles for repairs.
IV. Prevention is Better Than Cure: Pre-Installation Planning Advice
The most effective way to avoid vanity-pipe misalignment is thorough planning before renovation begins.
Finalizing the vanity size and style before plumbing rough-in is a fundamental preventive measure. Many owners proceed without confirming vanity specifications early on, leading to various misalignments later. Ideally, confirm the vanity's installation position and dimensions before tiling.
Considering a wall-mounted drain design can fundamentally solve many misalignment issues. It is not only more aesthetic but also avoids floor drainpipes occupying cabinet space, improving storage utility. Note that wall-mounted conversions have stricter product requirements; it's best to purchase matching components from the same supplier.
Precise Positioning of Plumbing Points is crucial for prevention. The ideal height for angle valves is 45-50cm; their horizontal position should avoid conflict with drawer slides. If planning for a smart mirror, calculate the power outlet height carefully—typically 65-75cm above the planned installation height of a wall-mounted cabinet—to hide the cable perfectly.
Conclusion
An old saying in the renovation industry holds true: "The product counts for 30%, installation for 70%." Even a high-quality bathroom vanity will fail to deliver on its promise if installed incorrectly.
Before installing a bathroom vanity, carefully measure the pipe locations and vanity dimensions. Best practice is to finalize the vanity style and installation position during the early planning stages of the renovation. If misalignment has already occurred, choose the appropriate solution based on the severity—from simple flexible hose adaptations to localized pipe modifications.
Renovations inevitably present challenges, but with the right approach, the problem of vanity and pipe misalignment can be completely resolved. A well-fitted, functional, and beautiful bathroom vanity will significantly enhance your bathroom's appeal.

